This guide will show step-by-step instructions for setting up email on Bluemail on Windows.
Adding a new account:
- Select the Setting Icon and choose Accounts
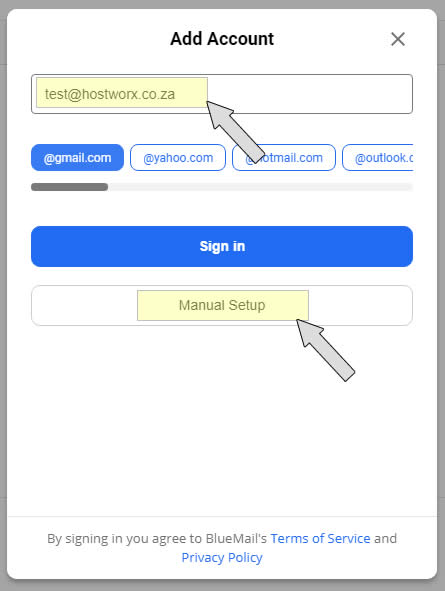
- Click the Add Account button.
- Choose Manual setup
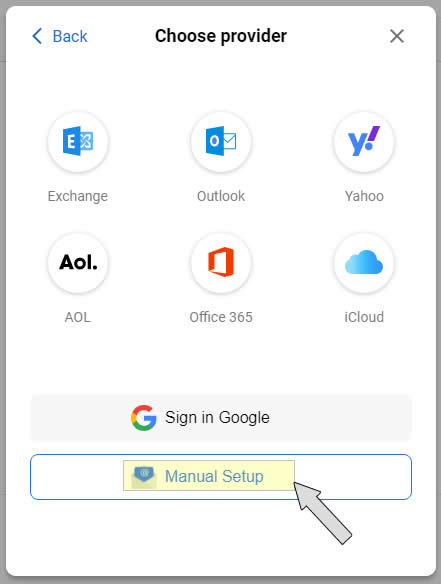
- Click the Manual Setup Button again.
- Choose POP or IMAP.
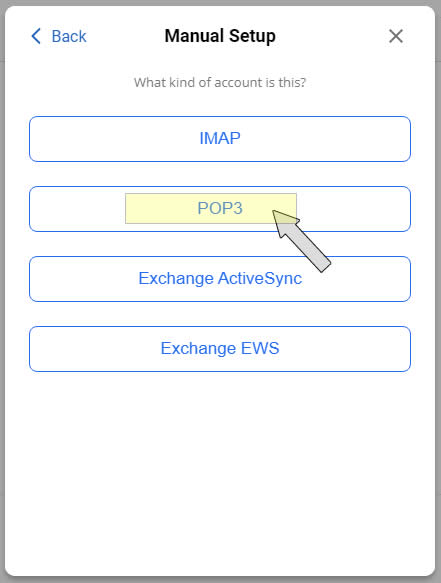
- Click POP3.
Account Settings:
- POP3 Settings
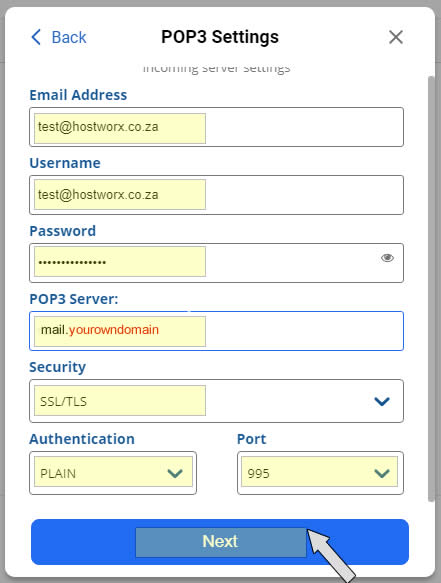
- Enter your Email Address as you want it to appear on your outbound email messages.
- Enter your username which is your email address.
- Enter your email password.
- Enter MAIL.yourowndomain as your POP3 Incoming Mail Server. You would not enter "yourowndomain" but your own domain name.
- Select SSL/TLS under security. You can select "none" if you get an error.
- Select PLAIN in authentication
- Enter your Port number. For POP with encryption 995 OR POP No encryption 110 / IMAP With encryption 993 OR IMAP No encryption 143
- Click Next
Outgoing Settings
- Enter your outgoing mail server settings.
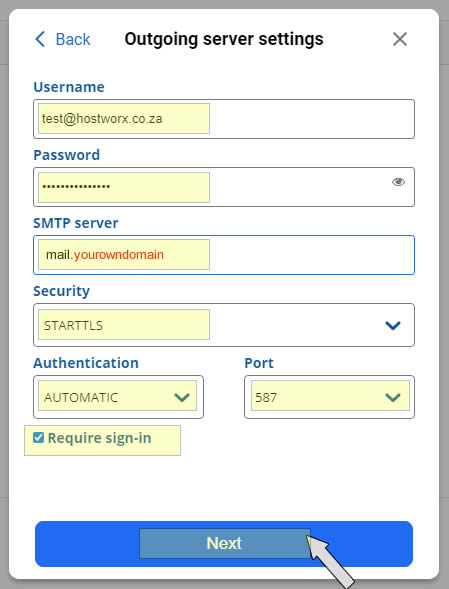
- Enter your username which is your email address.
- Enter your email password.
- Enter MAIL.yourowndomain as your POP3 Incoming Mail Server. You would not enter "yourowndomain" but your own domain name.
- Select STARTTLS under security. You can select "none" if you get an error.
- Select Automatic in authentication
- Enter your Port number to 587.
- Ensure Require Sign-in is checked
- Click Next
- Give your account a name and a description
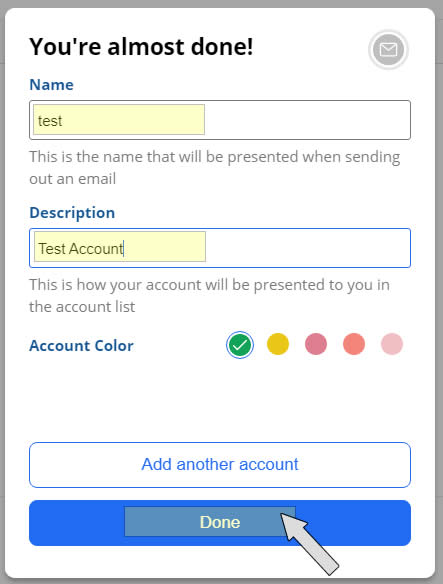
- Depending on how you manage your email, you will need to edit your account again once added, select the advanced tab, and under "delete emails" select the option that suits your requirements.
Completing the Setup
- Click Done to complete the addition of the account.


